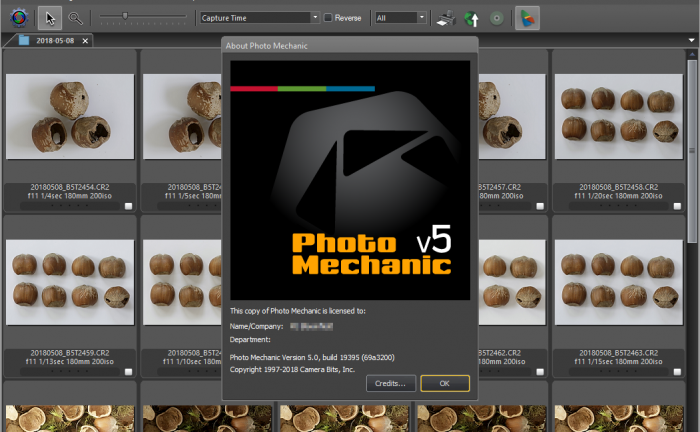
Photo Mechanic
Before I start this look at Photo Mechanic by Camera Bits I need to get a few things out of the way. Yes, we’ve started using Photo Mechanic. We’re not sponsored to do so. We still use Adobe Lightroom Classic CC and Photoshop CC {https://www.adobe.com/} and couldn’t work without them. All our images require keywording and detailed descriptions.
Let’s address the issues above. Photo Mechanic is never going to replace Lightroom or Photoshop. We’re wildlife and nature photographers, our images in the main have a subject that has a common and scientific name. Both of which are needed to make the image saleable.
It’s possible you might get away with a description “Big yellow flower” and anyone searching for a picture of a Sunflower, might just find it. But “Small brown fury thing” when someone is looking for pictures of Pine Martens, is I suspect going to be more of an issue. So; if we want to be able to sell images we must make it so that we and other people can find just what they are looking for. For the most part we do this with keywording and descriptions.
We first became aware of Photo Mechanic in an article Scott Kelby published about the workflow he uses when taking American football pictures . In that article he praised the speed of ingest and captioning he could achieve using Photo Mechanic.
Lightroom Classic CC, let’s face it is not the fastest, when it comes to importing images. A couple of hundred pictures, importing and you have time for a coffee and maybe even a snack before it’s finished. The time it takes is not that important if you’re going to keep all those images. But, we delete many of our images, low light levels, high frame rates, slow shutter speeds, quick moving subjects are a sure way of getting lots of rejects. So we would import images into Lightroom then on a bad day delete 50% of the images we had spent all that time waiting to import.
Photo Mechanic on the other hand is a wiz at ingesting (same as Lightroom’s importing). A typical ingest with Photo Mechanic is, open the ingest dialogue box, select the preset that creates folders, based on the capture date, rename the file, then makes two copies. One to an external drive another to a NAS (Network Attached Storage).
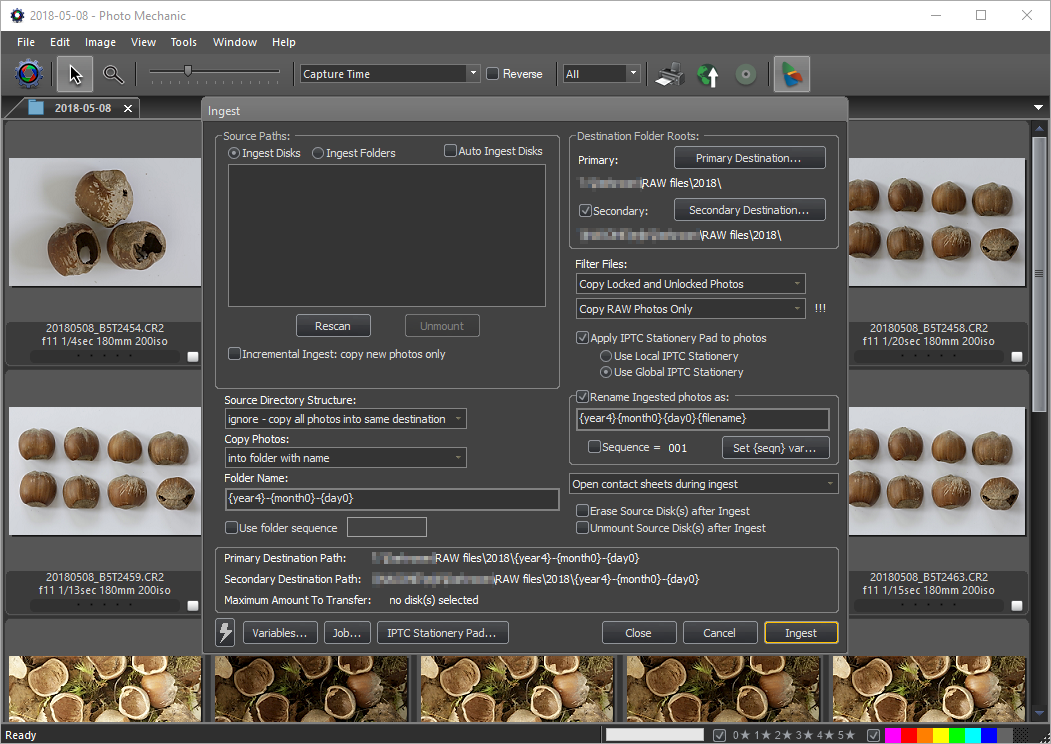
Ingest dialogue in Camera Bits Photo Mechanic 5.0
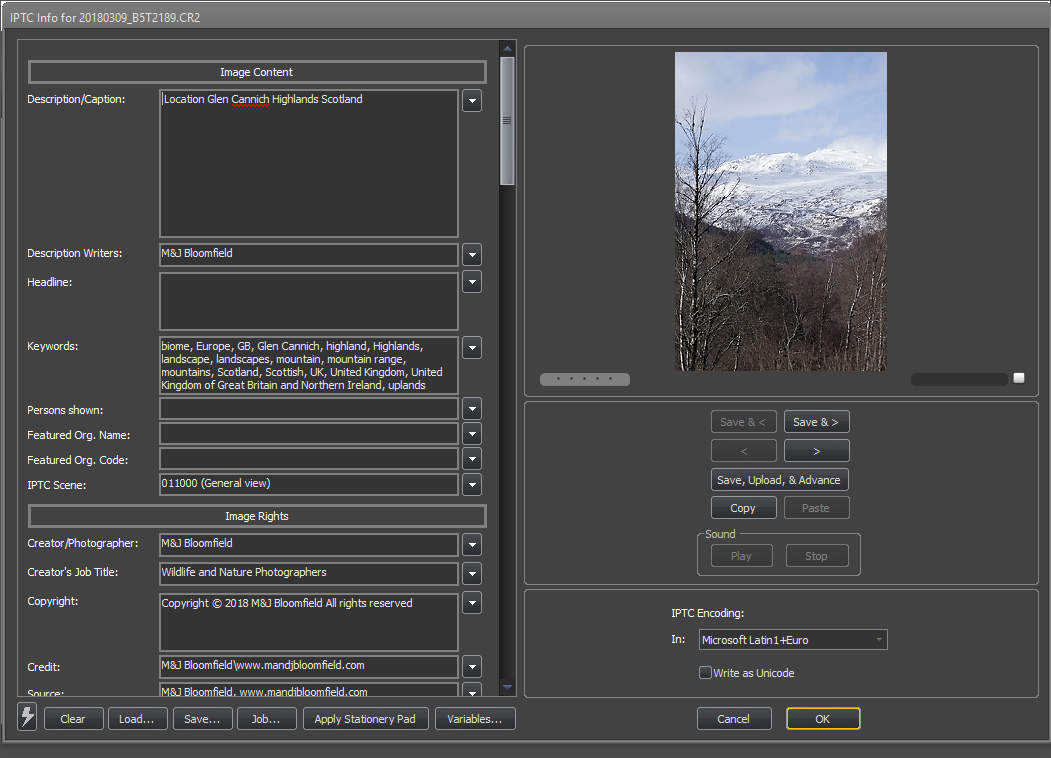
Before we start the “Ingest” we edit the IPTC (International Press Telecommunications Council) stationary. The IPTC data contains things like our copyright notice, location information and other key data that will travel with the image for the rest of its life.
IPTC stationary Camera Bits Photo Mechanic 5.0
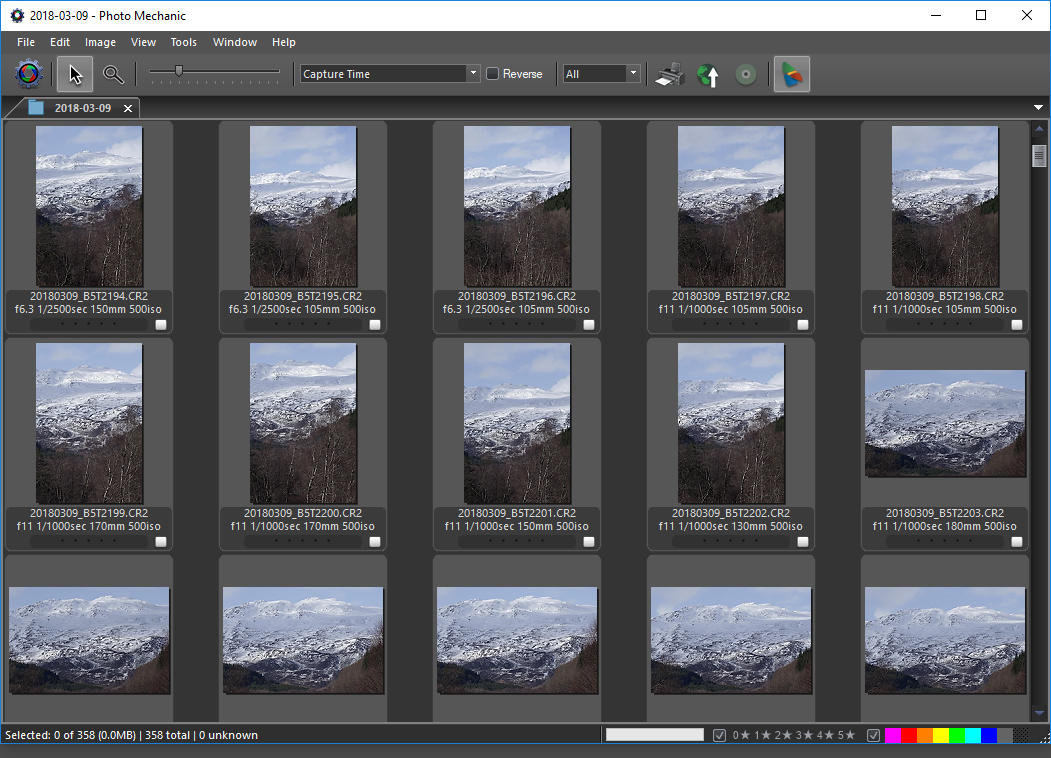
Once done, click Ingest to start. And this is the magic, almost as soon as the ingest starts you can start reviewing your images. You are viewing, sharpened previews that you can zoom into 100% to make critical sharpness decisions. We also get rid of “oops” and “bugger” pictures that we all take. It’s really simple you just hit ‘T’ on the keyboard to tag the image.
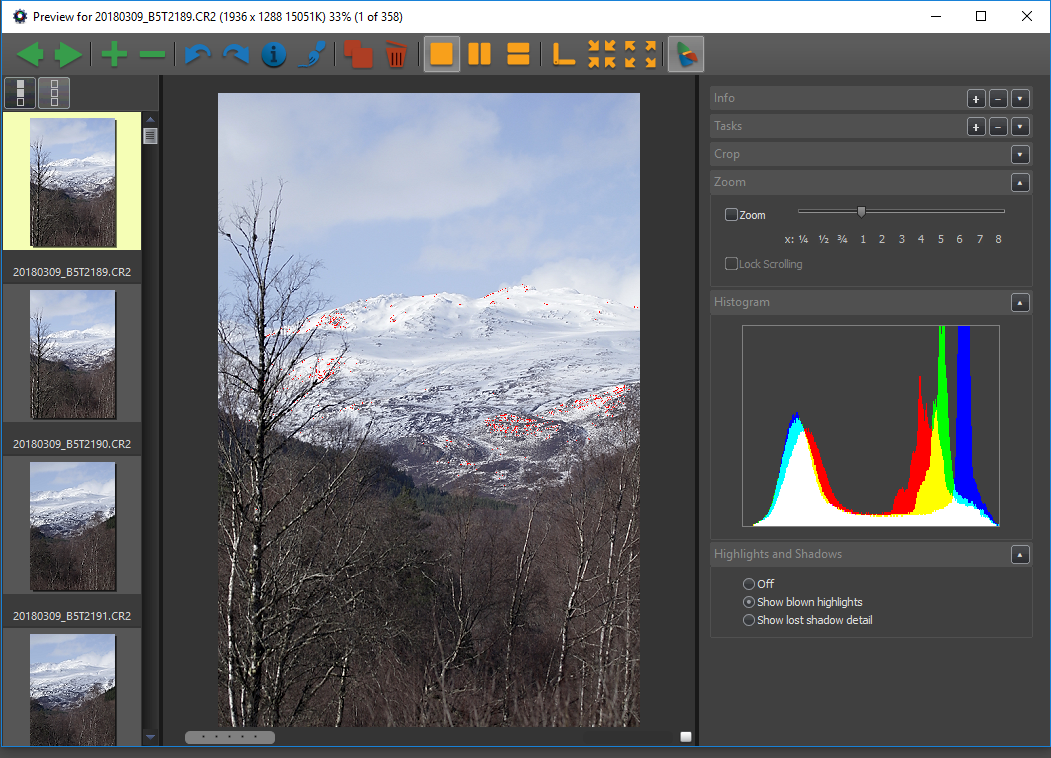
Preview Screen Ingest dialogue in Camera Bits Photo Mechanic 5.0
Once one ingest is complete, we swap cards and start again. As soon as we’ve looked at every image and decided what we want to keep we delete the “tagged” images, leaving us with only images that could possibly be keepers.
To be honest adding keywords in Lightroom is not the best user experience. Lightroom is far away from having a controlled vocabulary for keywords. And for us this is important. Before Photo Mechanic we had to do a lot of copying and pasting from MS Word documents into the keyword fields in Lightroom.
Now we have “Structured Keywords” proper controlled vocabulary. It works by reading a file that is structured similar to this.
animals
{animal}
wild
{wildlife}
{feral}
{undomesticated}
vertebrates
birds
{aves}
{avian}
{bird}
wildfowl
{waterfowl}
{Anseriformes}
{Anatidae}
swans
{swan}
{farmland}
{grassland}
{marine}
{intertidal}
{inter-tidal}
{urban}
{suburban}
{wetland}
Mute Swan
{Cygnus olor}
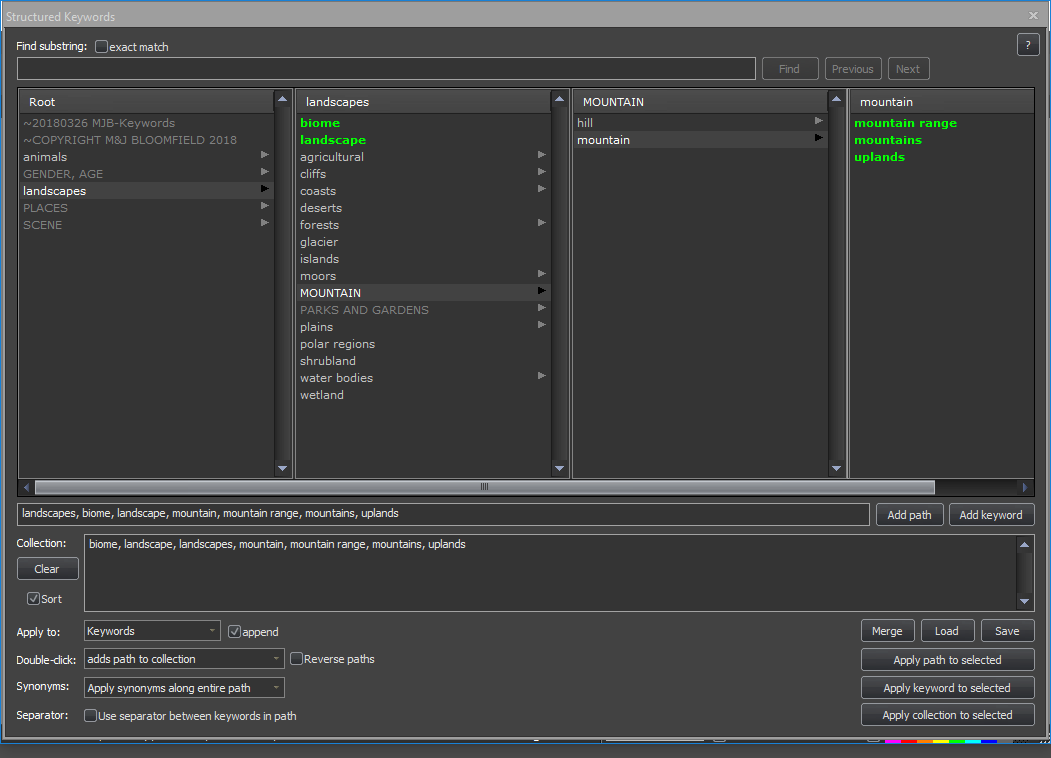
Structured Keywords dialogue Camera Bits Photo Mechanic 5.0
Double click on “Mute Swan” and you will add all the keywords at once.
animals, animal, wild, wildlife, feral, undomesticated, vertebrates, birds, aves, avian, bird, wildfowl, waterfowl, Anseriformes, Anatidae, swans, swan, farmland, grassland, marine, intertidal, inter-tidal, urban, suburban, wetland, Mute Swan, Cygnus olor
The beauty of the system is all those keywords in a couple of clicks. Now, it would not be of much use if the file contained one species of bird. Our current keyword file is about 10000-15000 lines and growing daily. It’s taken a whole lot of time to get the keyword file sorted but it’s so worthwhile.
As well as automating the keywords the other great feature is “Code Replacement”. Create a text file with a short code and then a tab and the replacement text. For the Mute Swan example you could create a code replacement file like this.
msm Male (Cob) Mute Swan Cygnus olor
msf Female (Pen) Mute Swan Cygnus olor
mss Young cygnet Mute Swan Cygnus olor
Now when you need to write a caption you use a short code “\msm\ swimming on the River Thames near Windsor Berkshire”. The short code is replaces by the contents of the file after the code. So the final caption reads “Male (Cob) Mute Swan Cygnus olor swimming on the River Thames near Windsor Berkshire”. This saves us a lot of copy and pasting of the common and scientific names into the caption fields.
The other feature we use is the GPS geotagging . Our DSLR cameras don’t have built in GPS geotagging, so we use an app on our phones to get the GPS location. We can copy and paste this information into a database on location. When we get back we can copy and paste the GPS data into the individual images.
The IPTC data for each image is stored, in an XMP (Extensible Metadata Platform) sidecar file. This file has the same name as the image file, but with the .xmp extension. When you import the processed images into Lightroom, Lightroom reads the .xmp file and fills in the relevant fields in its internal database.
Home Screen Camera Bits Photo Mechanic 5.0
We end up with an image in Lightroom that uses the best software for the task. The import into Lightroom automates a lot of the colour and lens corrections as well as simple development settings. Photo Mechanic allows us to import only what is of use to us and caption and keyword those images.
Conclusion
We are still getting to know Photo Mechanic. It has done what we wanted it to, speed up selecting, captioning and keywording our images. To be fair we are still on a steep learning curve, learning something new every time we use it. What we found is if you need to sort through hundreds of images and add IPTC data then it may be worth looking at integrating Photo Mechanic into your workflow. It’s never going to replace Lightroom or Photoshop but it is a very, very useful tool.

Comments RSS Feed