
Setting up a desktop studio
Ever since we started, we’ve taken product pictures and macro shots using a studio. Perhaps studio is too grand a title, for the assortment of locations around the house, we’ve used over the years. The one thing they all had in common was they were temporary and got in the way when you wanted to eat, go downstairs go to bed, etc. Limitations, however; were only on free movement, not quality. You can achieve great-looking images no matter what setup you use.
A sudden need
Last spring, a personal event caused us to think about how we were setting up our studios. I had a small problem with my heart. Thankfully; the wonderful cardiac doctors and nurses, at Raigmore Hospital, managed to fix me. And although; I was only in the hospital for a couple of days, I was restricted in what I could do physically for a period, after the operation. This put pay to rushing around the wild Scottish Highlands, taking pictures.
So we looked locally. Bringing back, to our makeshift studios, all manner of flora and fauna. Very soon, it became apparent; the way we worked previously had disadvantages. Having to tidy away at meal and bedtimes every day became a chore. It slowly began to dawn on us it would be nice to leave things all set-up ready for the next day. Maybe what we needed was a dedicated studio space.
What do we really need?
After carefully thought, we needed a space that allowed us to handle commercial subjects up to a foot or so, and be suitable for macro and micro photography. The plan was main use, a small macro photography desktop space that could be used to photograph commercial projects as needed.
Initial plans were vetoed by management. For some reason building brick piers and sourcing a 10cm thick slab of slate, to go on top was deemed, not to be in keeping with the rest of the house or supported by the floors. I tried to explain I knew a thing or two about building optical benches for macro and micro photography, you needed, a rock-solid base. But the veto remained in place, so time to think again.
That was in the spring of last year, as with many projects, other stuff got in the way. I got better and so it wasn’t until the backend of the year, we started thinking again about a studio/macro bench. You do a lot of thinking, during one of the wettest winters on record.
The solution
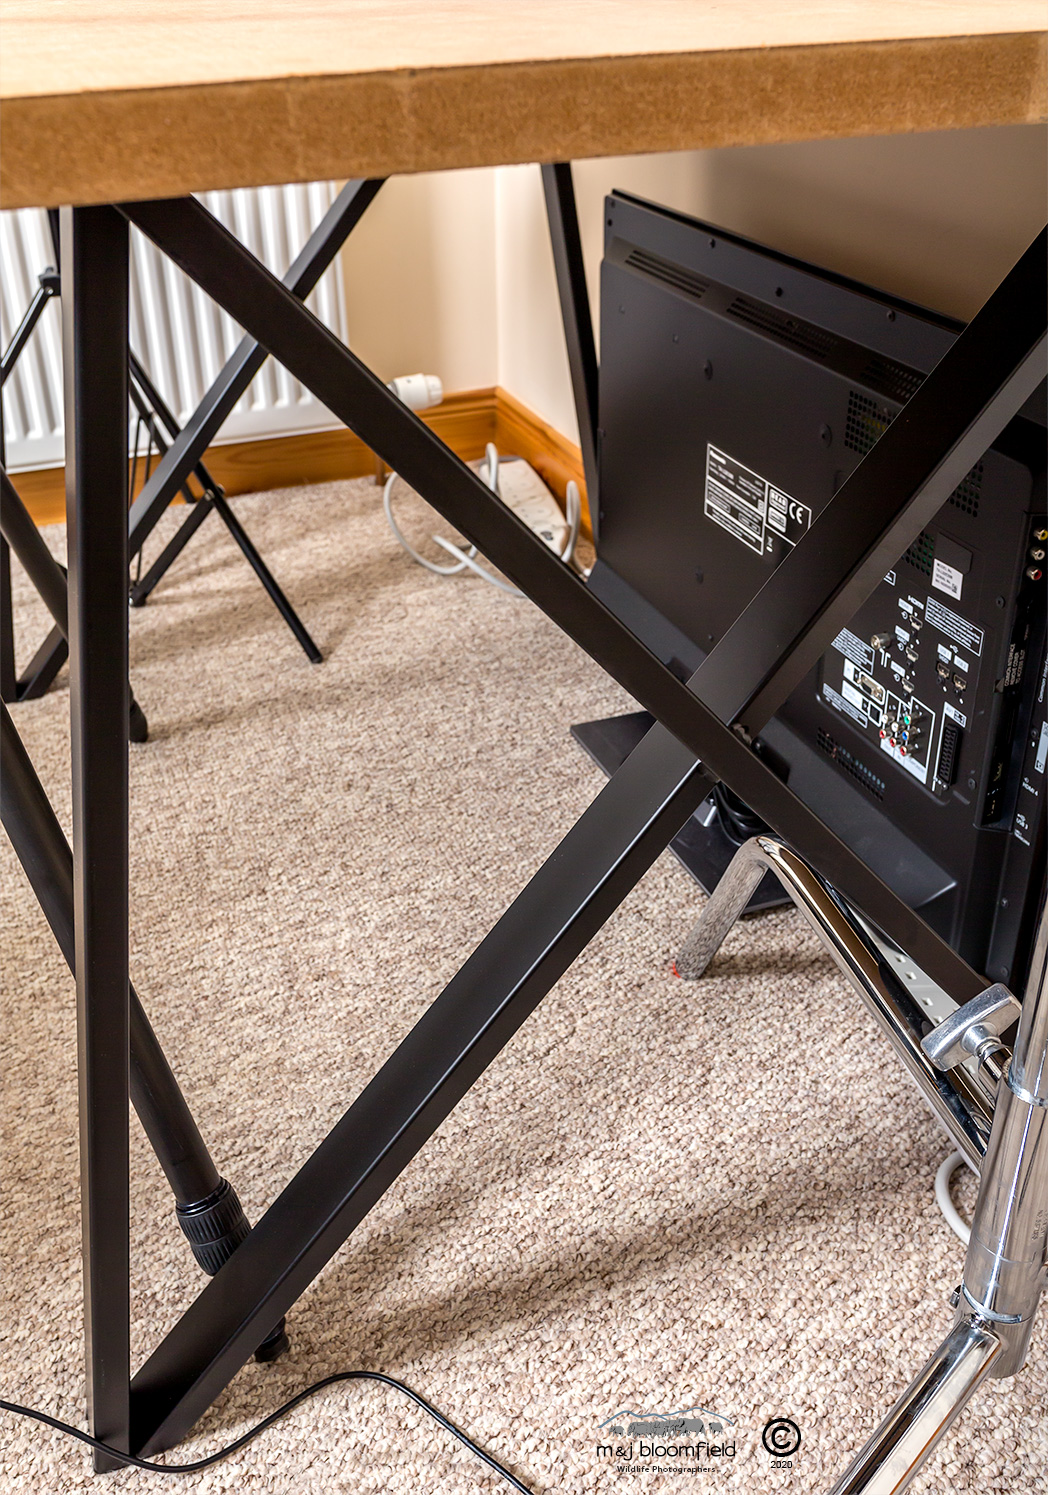
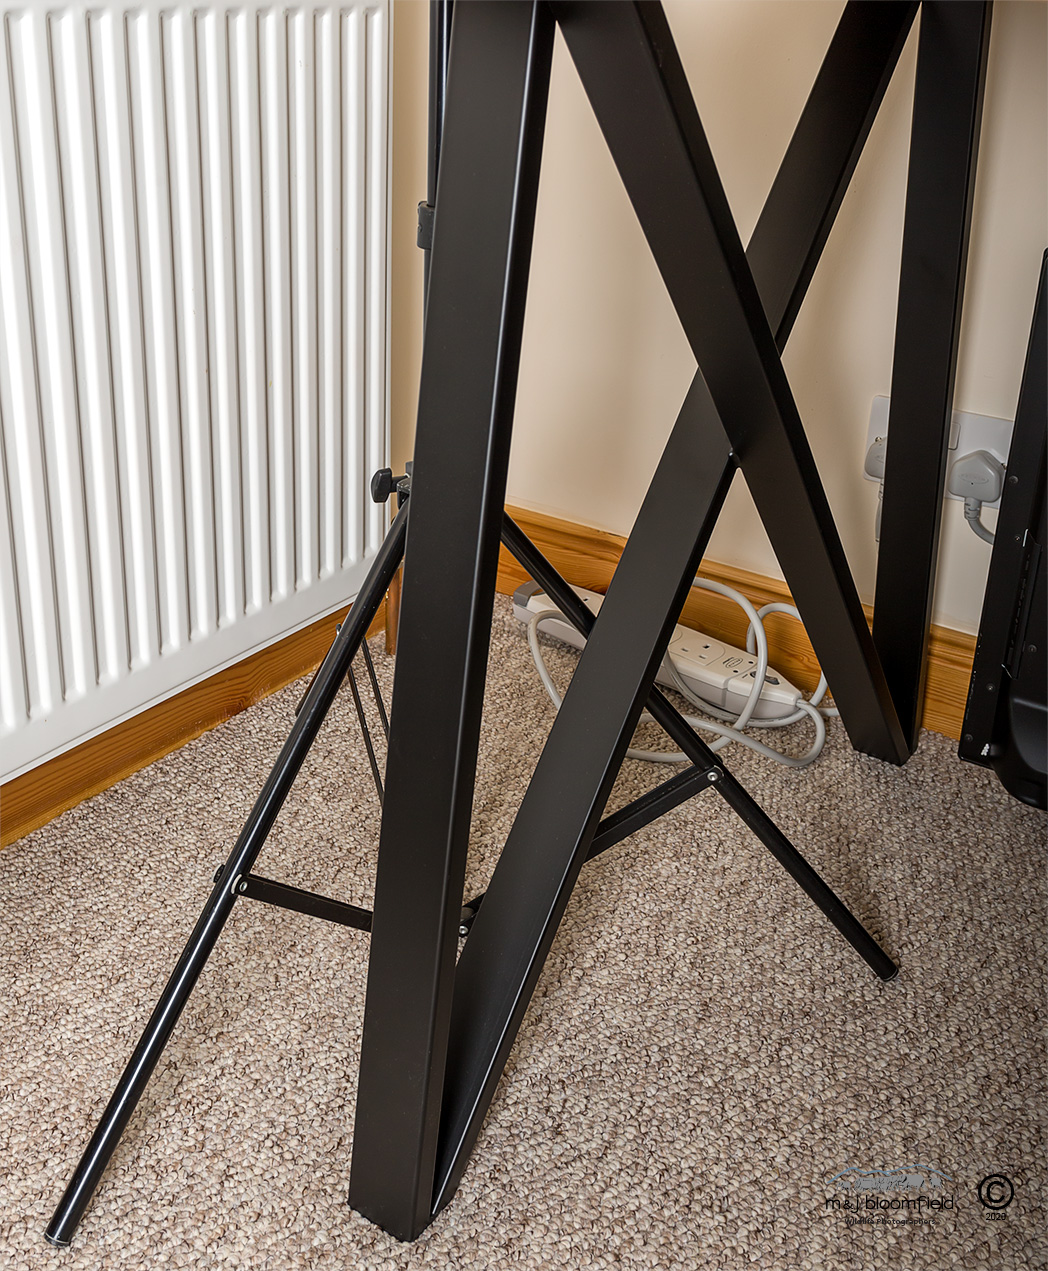
Space as always is at a premium, and as you can see from the pictures that accompany this post, our upstairs rooms all have sloped ceilings. This prompted us to go with a bespoke size that would fit the space. It had to be sturdy, fairly heavy, to dampen movement. We looked at kitchen worktops but finally settled on plain unfinished 30mm Medium-density fibreboard (MDF) sheet. The reason for our choice? The surface is comparatively non-slip, whereas kitchen worktops or laminated finish tends to be very slippery. We were afraid, vibrations could move objects on the table.
Woodsheets https://www.woodsheets.com a company we have used before have a bespoke service – cutting wood to exact measurements and delivered directly to your door.
You can see the shape of the legs and the thickness of the MDF sheet. The top is held on with 8 screws which are easily removable.
The surface is not sealed and we don’t intend to treat the surface in anyway. It will over time become marked and possibly gouged etc. However; we can order another top and 16 screws later, we have a new table. Recognising that things will get messy, we have a waterproof cutting mat that covers most of the top. But; it’s going to start looking well used very quickly, but it’s a work area.
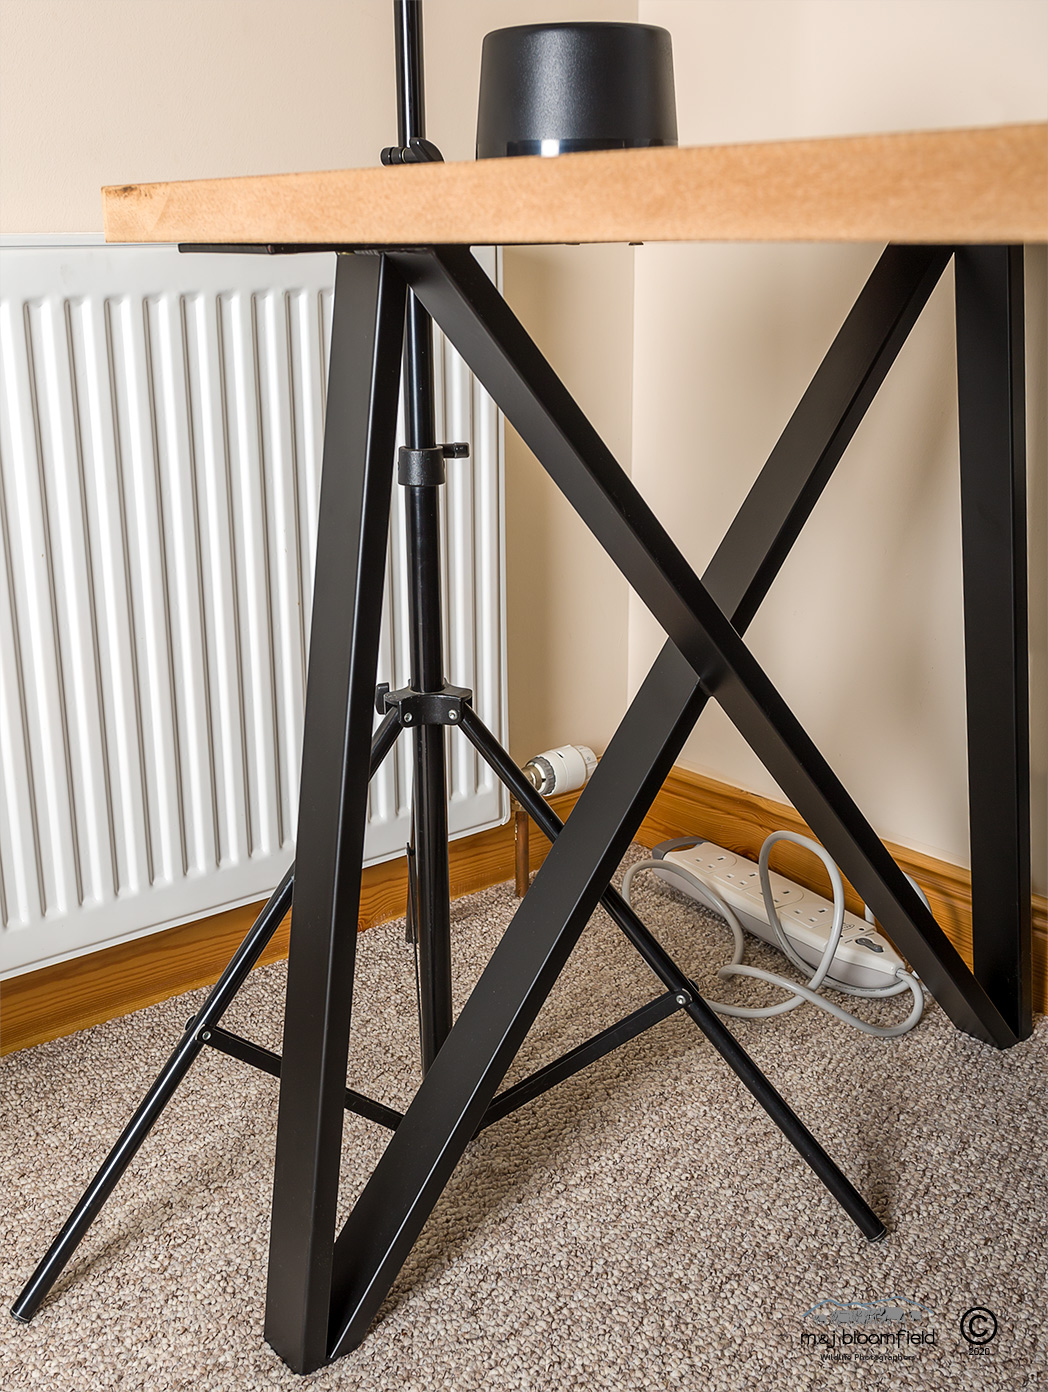
Close up of one of the Hartleys Industrial Double Cross Table Legs with a C Stand fitted under.
We needed legs for our lump of MDF they came from another online supplier https://www.hartleysdirect.com/ Hartleys Industrial Double Cross Table Legs to be exact. We choose this design because they have a high load capacity 150Kg and allow light and C stands to tuck under the X bar without getting entangled. We can get the column of the stand close to the edge of the table. All-in-all, the table weighs about 40Kg, which helps to dampen movement, and should support me sitting on it (not yet been tried).
Even with the limited amount of room the legs allow for a lighting stand to be easily positioned close to the edge of the table.
Accessories
You, or should I rephrase that, I collect a lot of useful things, that come in handy in a studio, so we need somewhere to put them. A draw unit from an online retailer (who is so big they don’t need a referral) houses things like A clamps, bongo ties, bits of card, foam board, blue tac and let’s not forget Gaffer tape. We had problems finding one that would go under the table, but management persistence paid off. It has the advantage; the laptop sits neatly on the top.
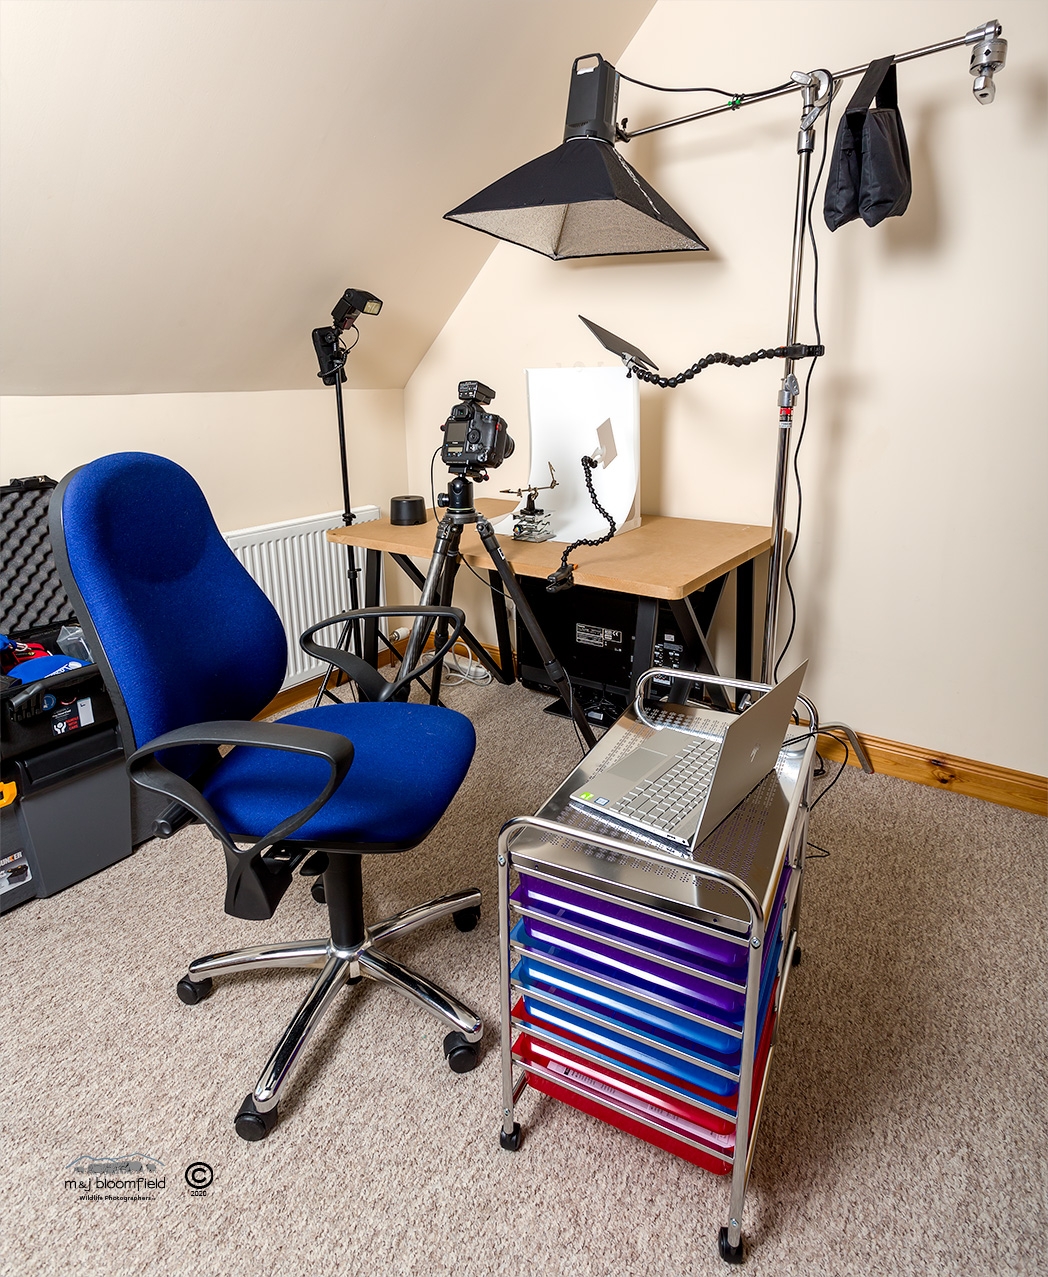
New studio set up with lights and stands in place.
What’s next?
So that’s it finished? Well not quite, there are still somethings that need to be done. We need a task light to see to focus and compose. This may be just a general-purpose light or the other idea is to buy some LED light panels giving us a continuous light option. We need something to put the tripods on. We think is a large circle of MDF to sit tripods on will insulate camera from the movement of the floor and carpet.
After that who knows? Over the coming months, we will be using the studio more because of the Covid 19 situation here in the UK. No doubt; we will find things that will help and maybe change a few things around. But for now, we have our new desktop small studio version one point zero.


Comments RSS Feed